Working Steps of Software
Learn to perform exact and accurate migration from Lotus Notes to Office 365 platform by using step-by-step software screenshots. It helps to understand the software work-flow and provides ease to understand entire working process. All steps are explained with complete details, so follow the given instructions.
- Download & Run Mail Migration Office 365 Software. Go to Start button & Click on Mail Migration Office 365 > Click on Export button to begin the Lotus Notes Migration process
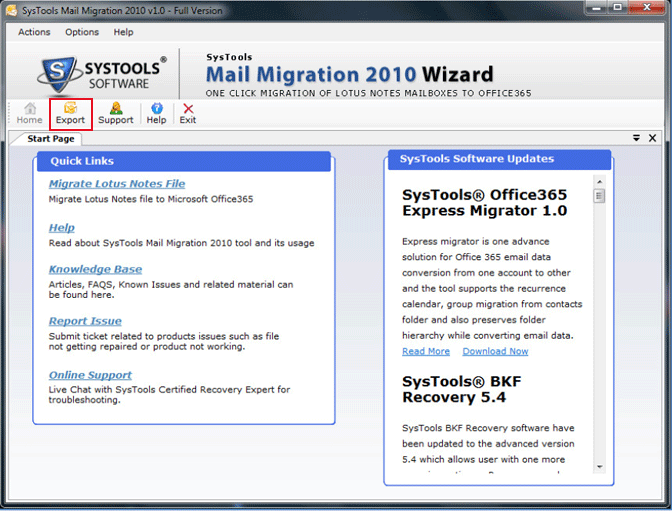
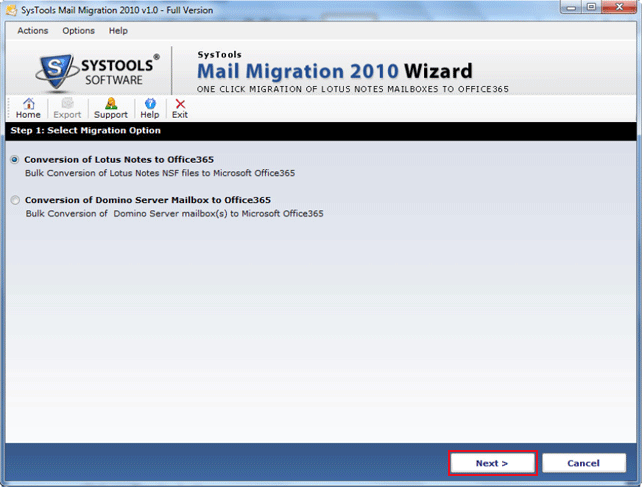
- Now Select Migration Option by which means users wants to perfrom migration.
- To Migrate NSF Files Select "Conversion of Lotus Notes to Office 365" option.
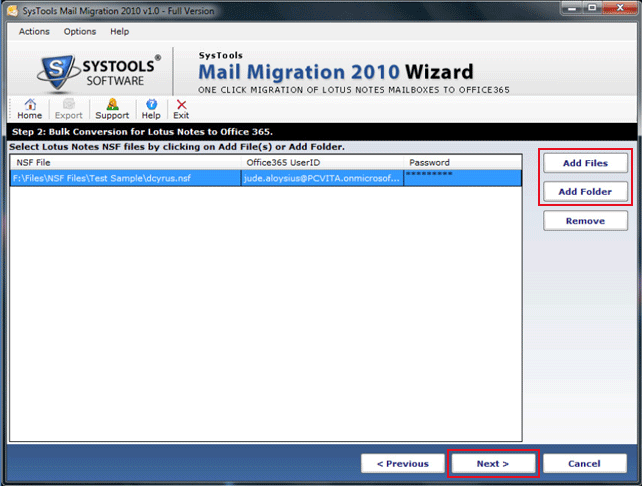
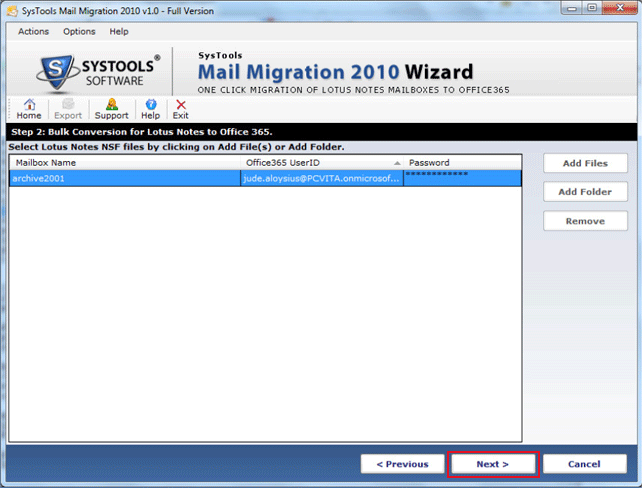
- Click on Add Files button to add desired NSF file(s) from system. Or click on Add Folder button to the folder containing multiple NSF files.
Now Enter Office 365 User ID and Password in respective columns. Click on Next button.
- Apply Filters to export the selected & desired data only. Then Click on Export Button to start migrating the selected data from Lotus Notes.
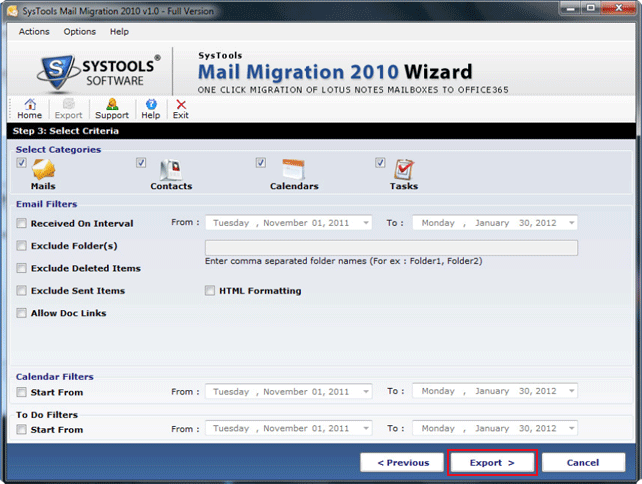
Apply data filters: Select the items that you need to migrate. Either selects one item or multiple items or all items at once.
Apply Email Filters:
- Received on Interval: If you need to migrate emails between a particular time periods then click this option & enter the ‘from’ & ‘to’ date.
- Exclude Folder: Enter the name of folders to be excluded during migration
- Exclude Deleted Items: to skip the deleted items, select this option
- Exclude Sent Items: Select this option to skip the Sent Items
- HTML Formatting: Check this option to keep all emails in HTML format
- Allows Doc Links: save the Doc Links of emails
Apply Calendar Filter: If you need to migrate calendars between a selected time frame.
To Do Filters:
Select the date range between which you need to migrate the To Do lists.
- Preview Status Reports to see the extact details of data before and after migration. See the Name of selected NSF files and Count of all items. Click on Ok button.
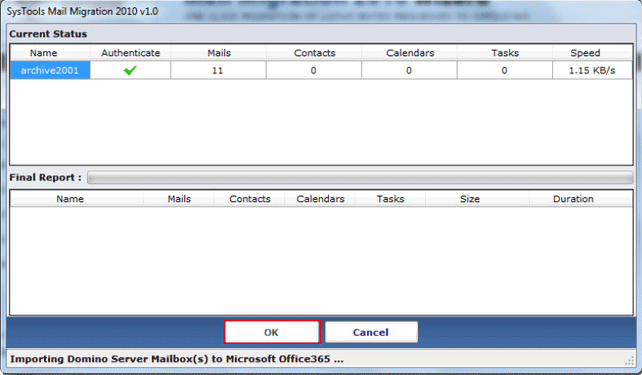
- Click on Ok button to close the process.

- To Migrate Domino Mailboxes select "Conversion of Domino Server Mailbox to Office 365" option.
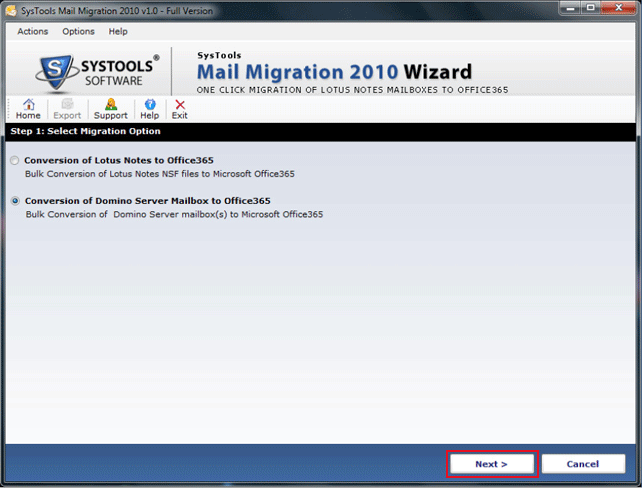
- Enter Domino Server Name and Password to login into Server. Click on Logon button.
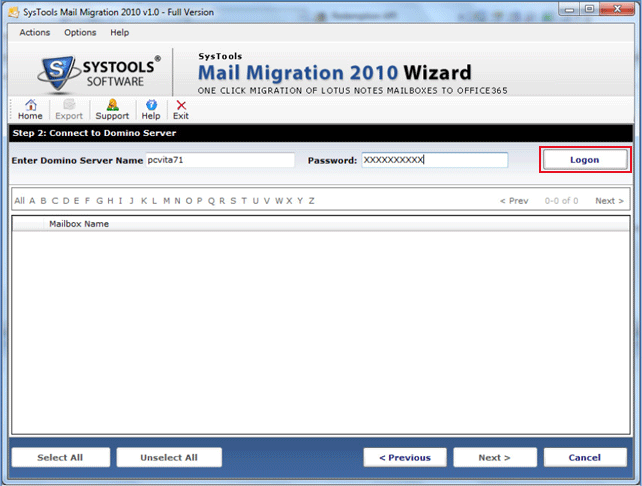
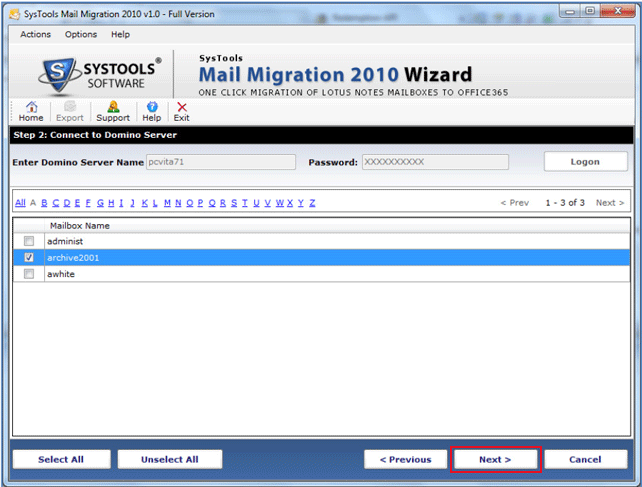
- Domino Mailboxes are populated in alphabetical order. Click on particular Alphabet to see all mailboxes beginning with that Alphabet. Select any desired mailboxes from the list. Click Select All button to select all mailboxes (of that Alphabet Category) and click on the Unselect All button to de-select all mailboxes (of that Alphabet Category). Click on Next button.
- For a particular mailbox, Enter Office 365 User ID and Password (where data has to be stored after migration). Click on Next button.
- Apply Filters to export the selected & desired data only. Then Click on Export Button to start migrating the selected data from Lotus Notes.

Apply data filters: Select the items that you need to migrate. Either selects one item or multiple items or all items at once.
Apply Email Filters:
- Received on Interval: If you need to migrate emails between a particular time periods then click this option & enter the ‘from’ & ‘to’ date.
- Exclude Folder: Enter the name of folders to be excluded during migration
- Exclude Deleted Items: to skip the deleted items, select this option
- Exclude Sent Items: Select this option to skip the Sent Items
- HTML Formatting: Check this option to keep all emails in HTML format
- Allows Doc Links: save the Doc Links of emails
Apply Calendar Filter: If you need to migrate calendars between a selected time frame.
To Do Filters:
Select the date range between which you need to migrate the To Do lists. - Preview Status Reports to see the extact details of data before and after migration. See the Name of selected NSF files and Count of all items. Click on Ok button.

- Click on Ok button to close the process.

Steps to Migrate Lotus Notes NSF Files to Office 365
Steps to Migrate Domino Mailboxes into Office 365