Learn The Steps of Conversion
- Download BKF Repair and install it. Launch the BKF Recovery Software by click on Start Button and choose BKF Repair from All Program List.
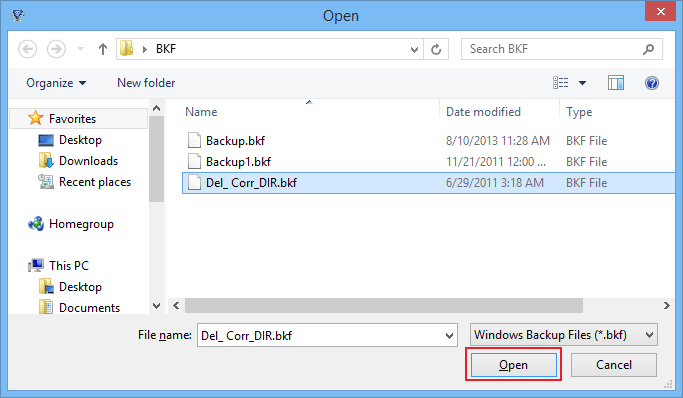
- A window pops up with first screen offers you to scan options. Manually you can get this option by clicking on Scan File option on Menu bar. Click on Browse button to set the location of BKF File.

- Select the appropriate location of BKF file and click on Open button to load the file for recovery.
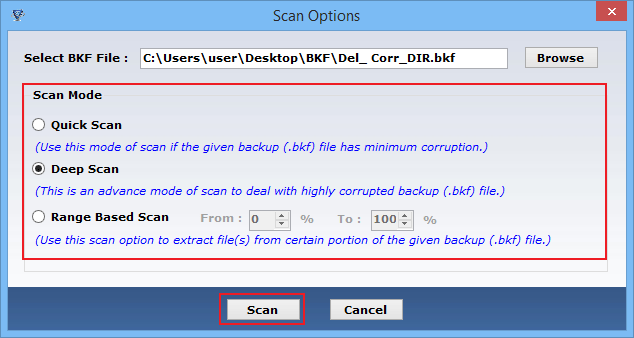
- Next screen shows the available modes of scanning like Quick Scan, Deep Scan and Range Based Scan. According to the requirement choose the appropriate scan option and click on scan button.
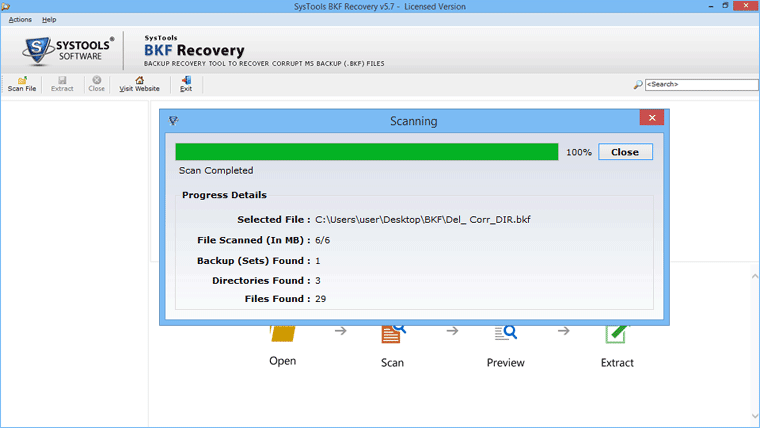
- Next screen shows the complete detail of scanning and shows the detail of repair process.
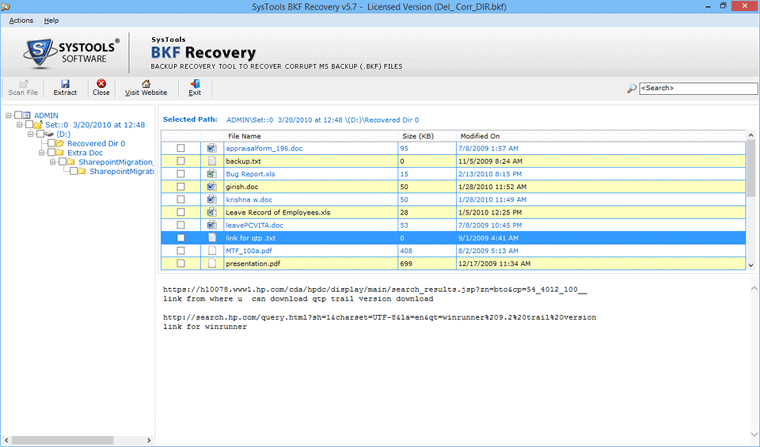
- After completing the entire scanning process next screen shows the entire data in proper hierarchy. To preview the underlying data of folders, expand the top level folders. After selecting particular folder its files and documents are previewed in footer pane.
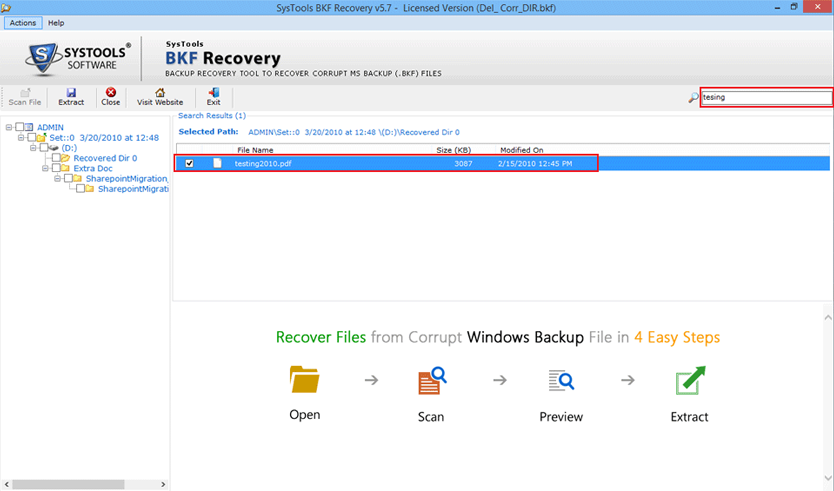
- For searching specific file by name, use the search pane at top right corner of software window.
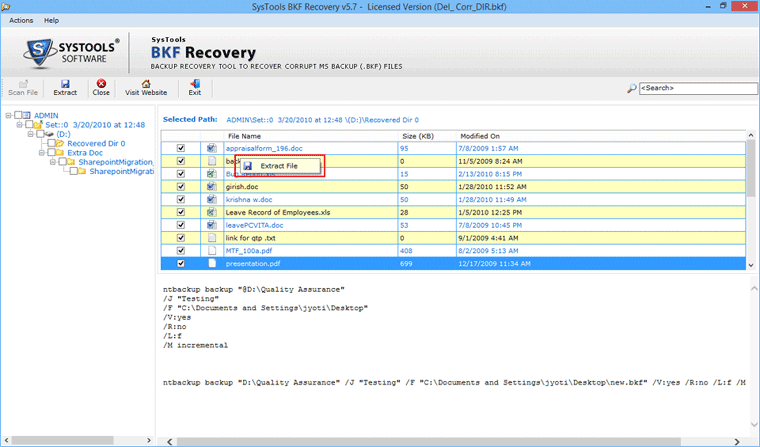
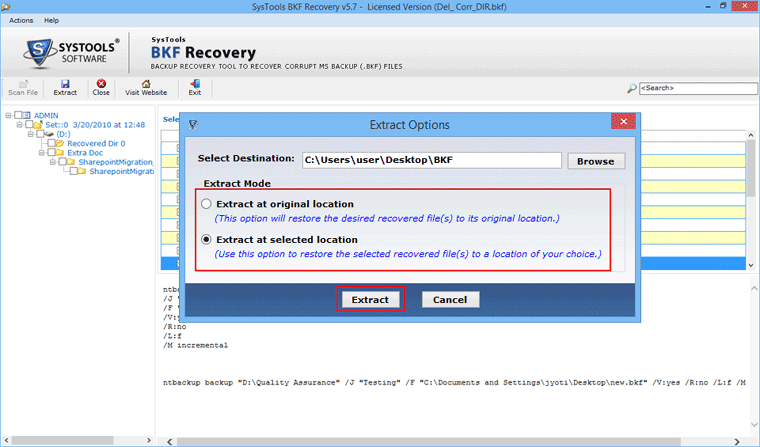
- Extract the required file by clicking on selected file and right click and select Extract File option or Click on Extract button on Menu Bar.
- Next screen shows the Extract options. Select the appropriate Location to save the repaired file by clicking on Browse button. Select the Extract mode like Extract at Original Location or Extract at Selected Location and click on Extract button.
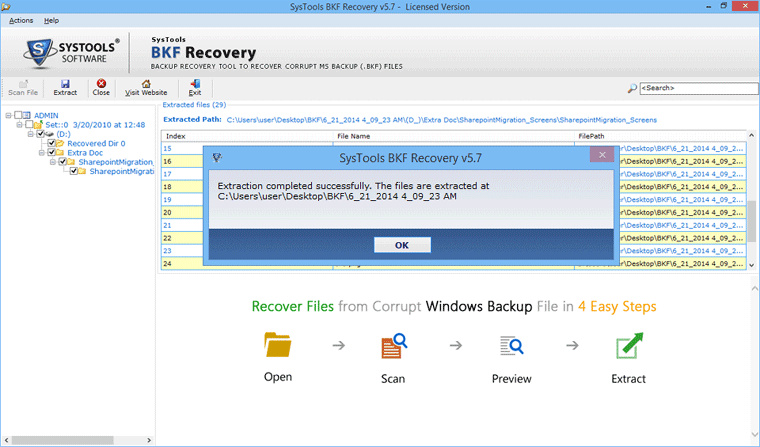
- Next screens show the completion messages of Extraction with the extracted Location of File