Step Wise Description of Complete Process
- After Download the free trial edition or purchasing full license version that following wizard appears.
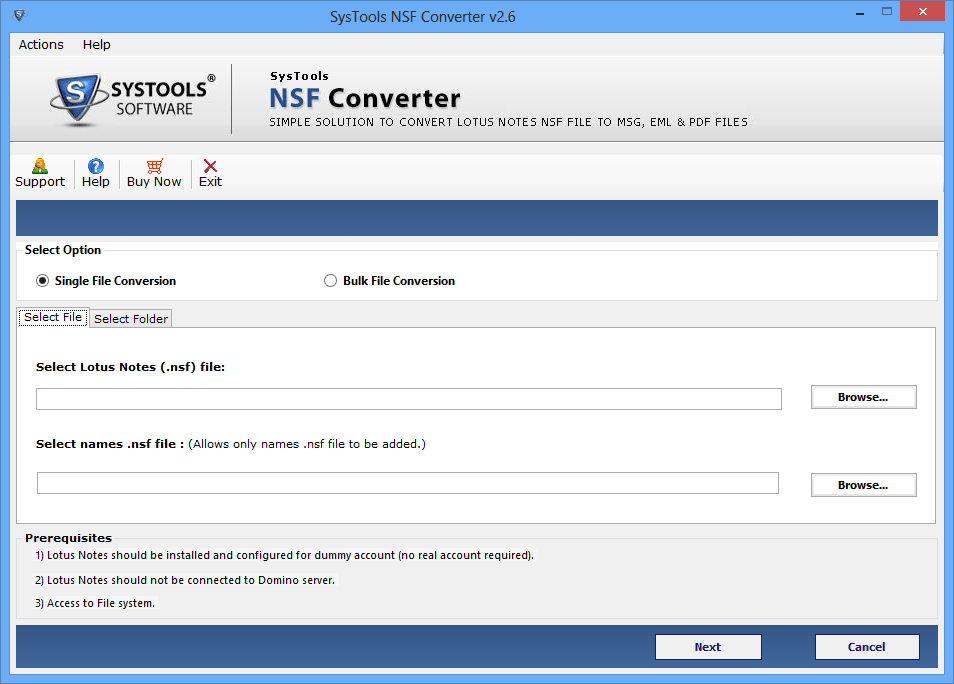
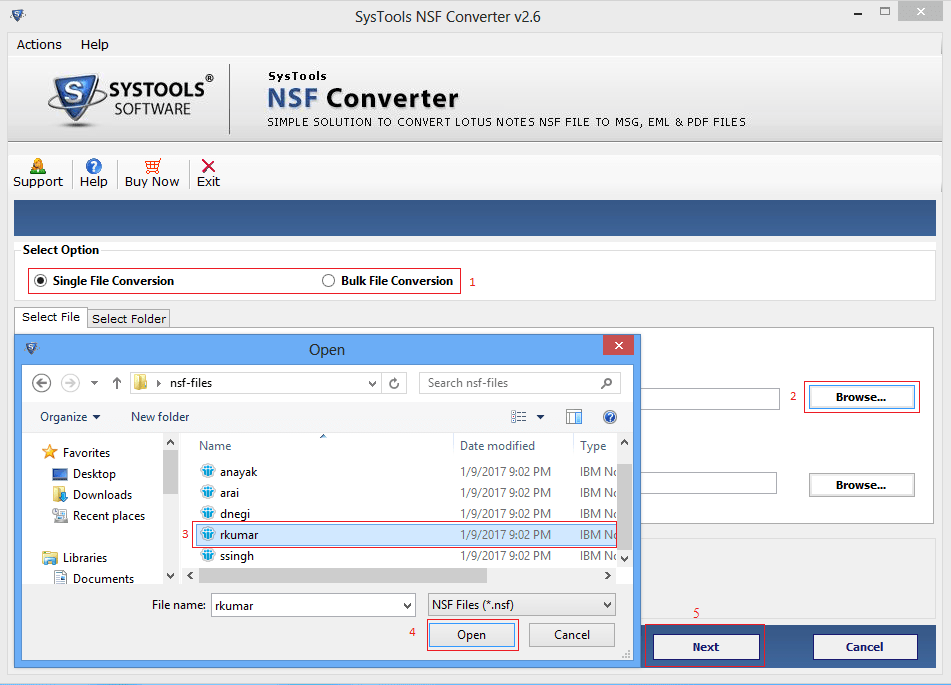
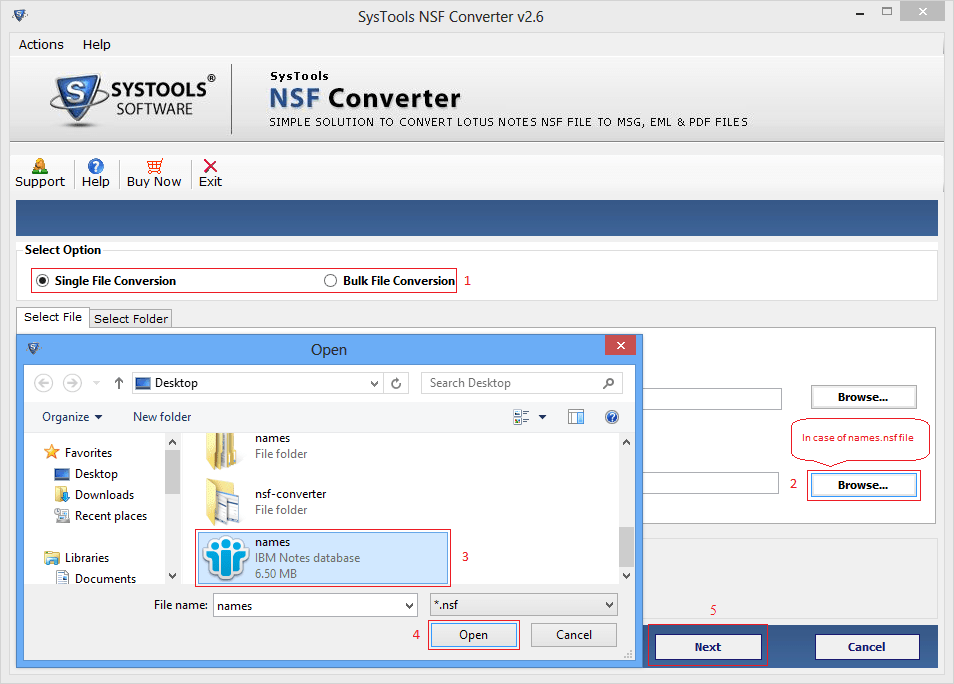
- Here you have found two options the first one is single file conversion & bulk file conversion. Now move on single file conversion option and browse the file to convert. Click on Next buton for conversion.
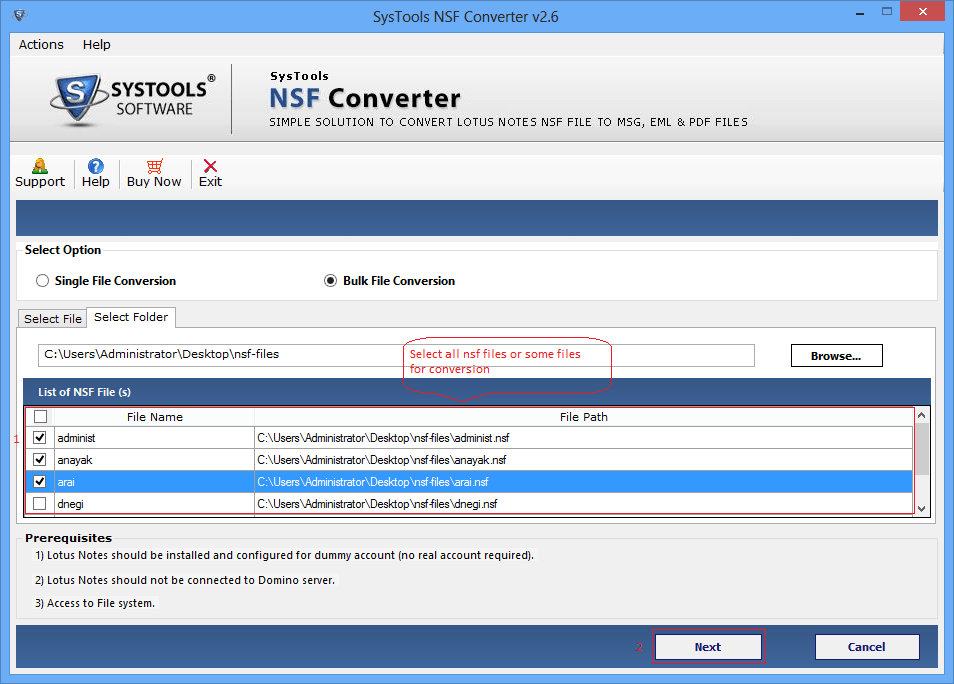
- The Another one is bulk file conversion option, if you wish to convert files into batch then go through bulk file conversion option and move further for specifying the destination location by pressing Browse button.

- Again, specify the location where you want to save EML/MSG/PDF file and then press Ok button.
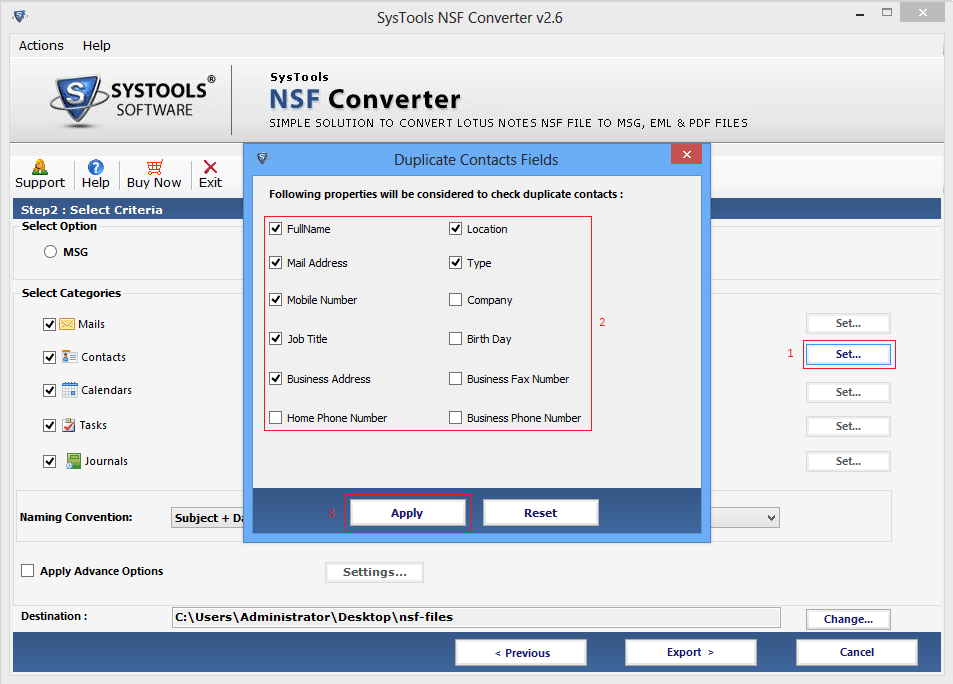
- In order to save the space, you can also exclude duplicate contacts.
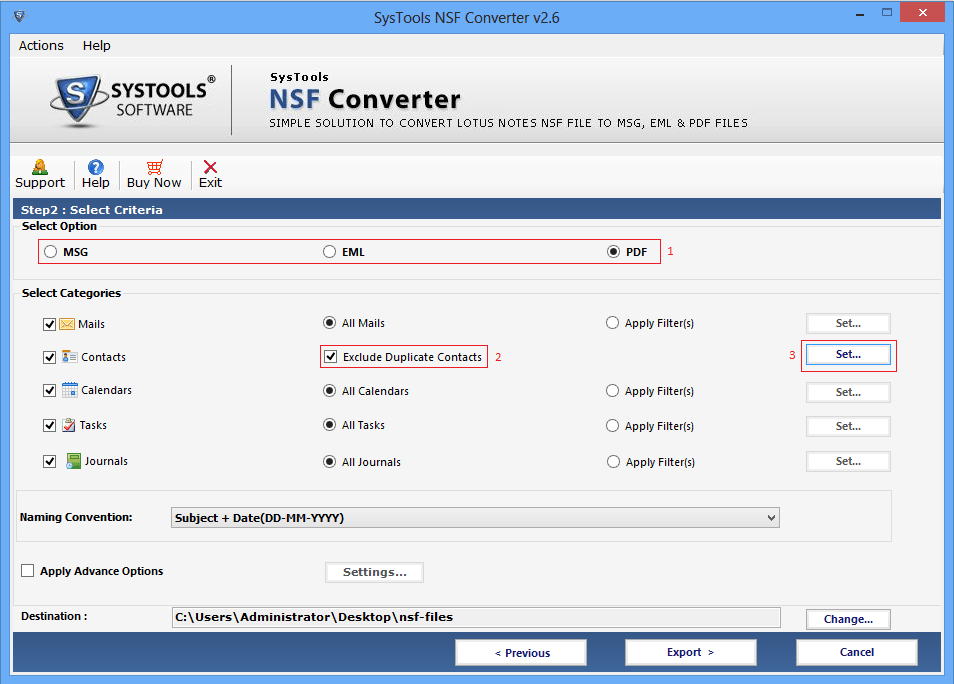
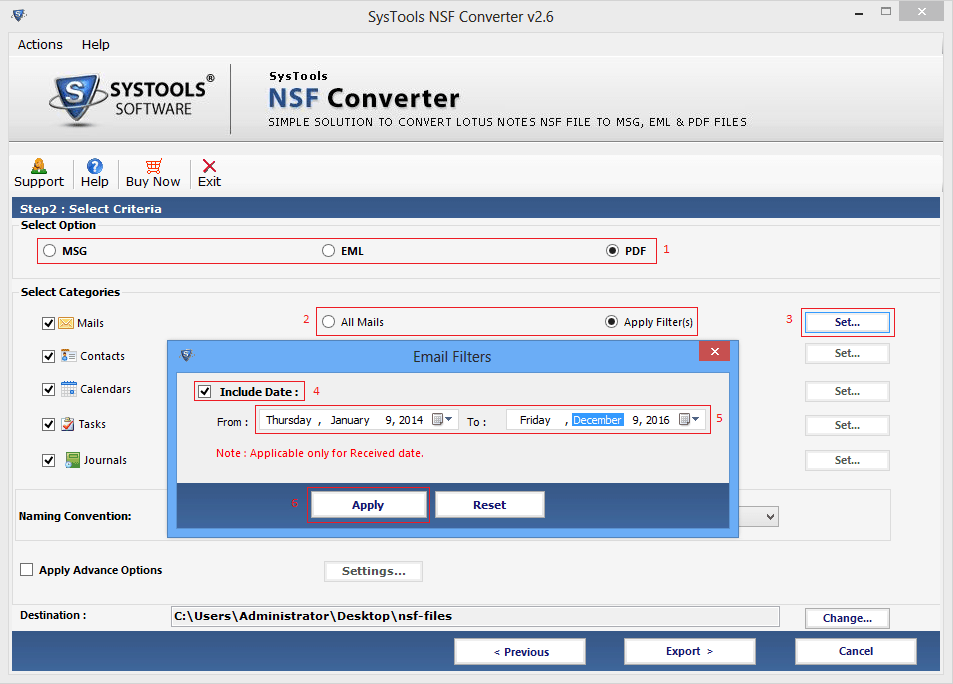
- There are diffrent filters to provide different fields
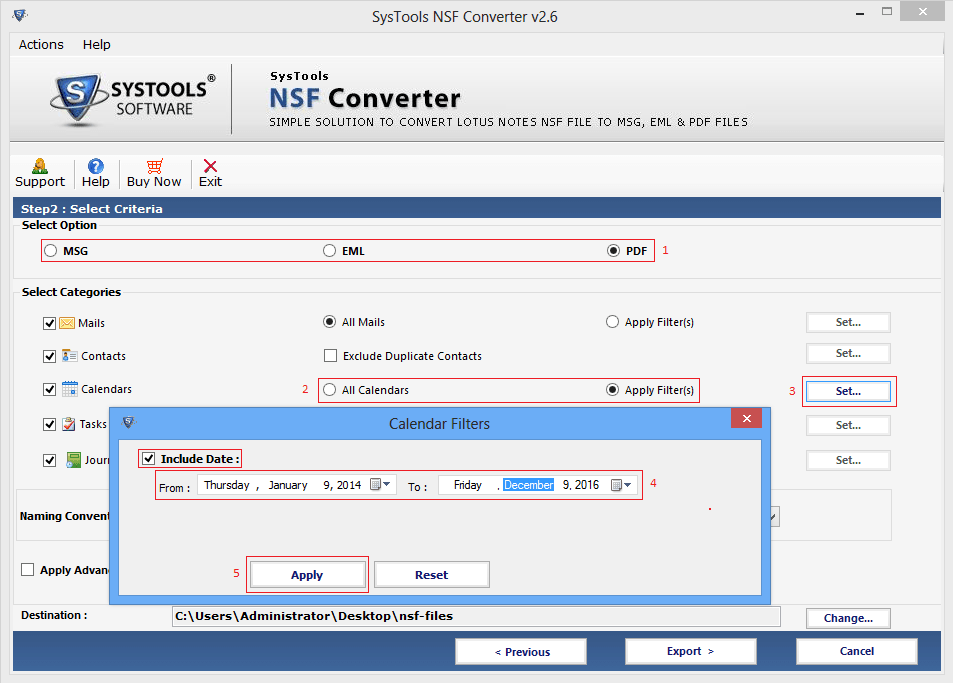
Apply Calender filter in calenders
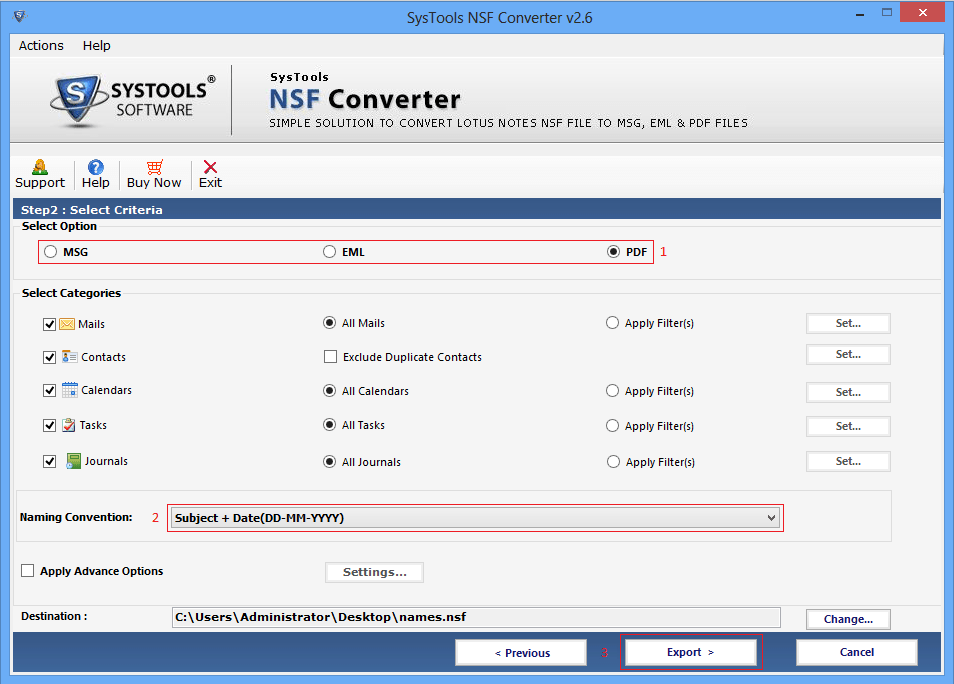
- Now select the naming convention option for select the date time format and then click on Export Option.
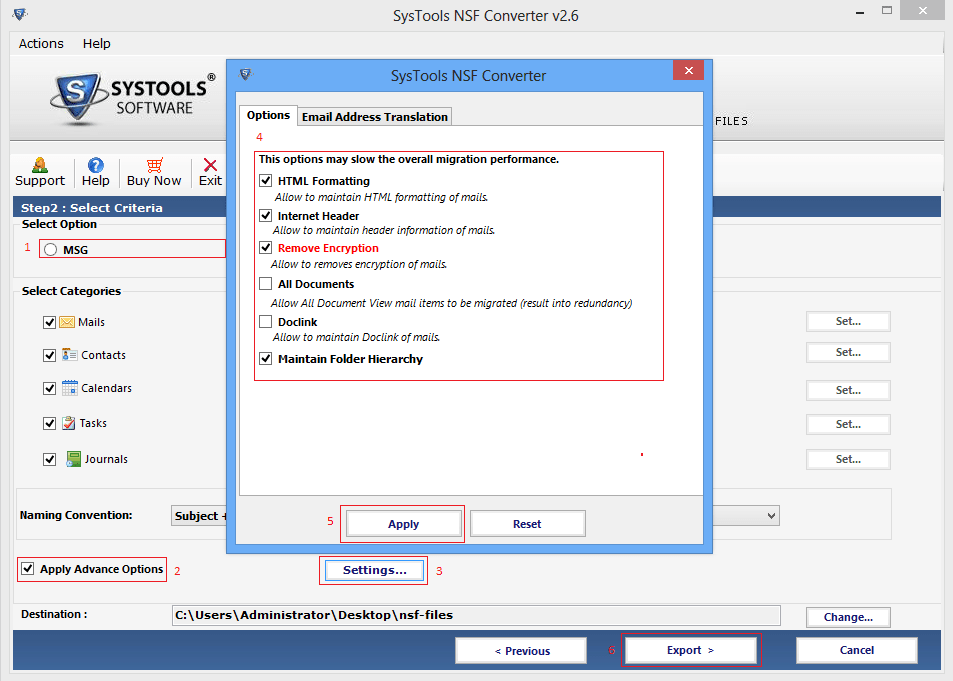
- An apply advance option available in which you can select the options like HTML formatting, Internet header, Remove Encryption etc.
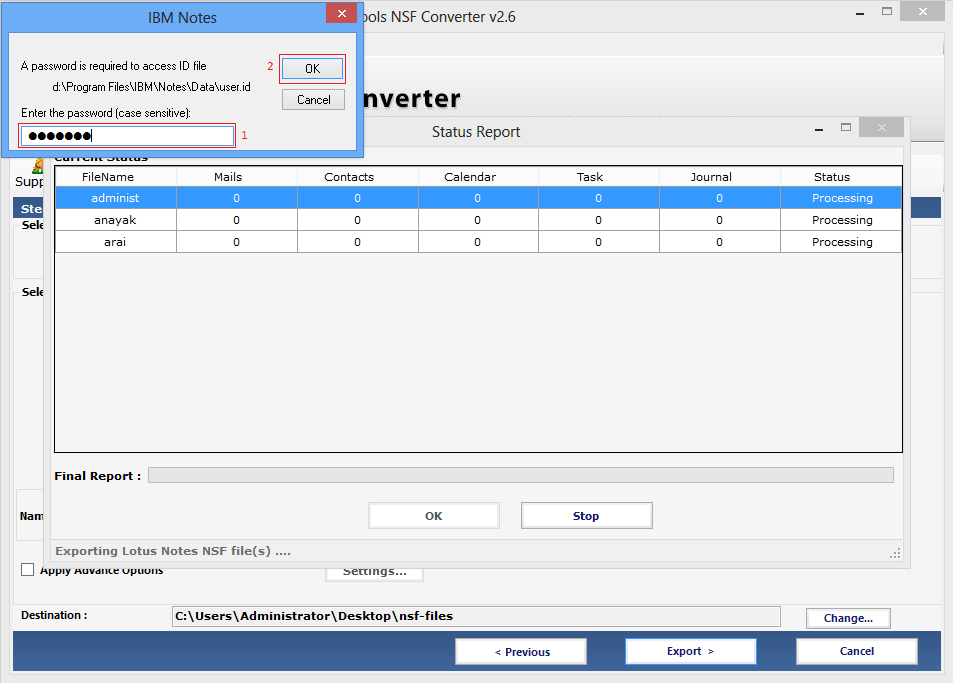
- Click on Export Option now need ID & Password. Enter the password.
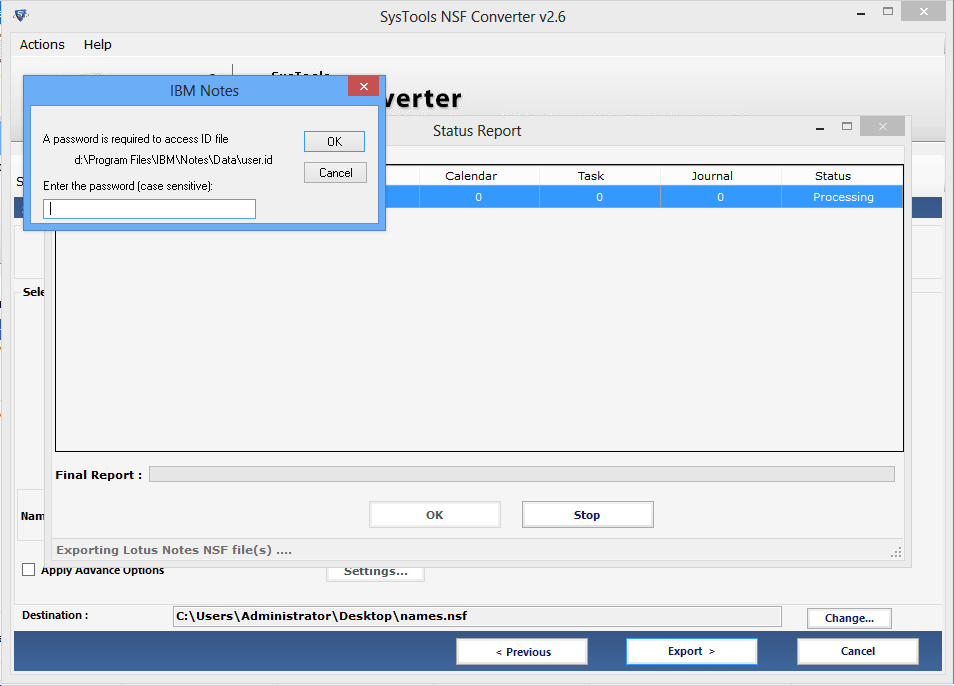
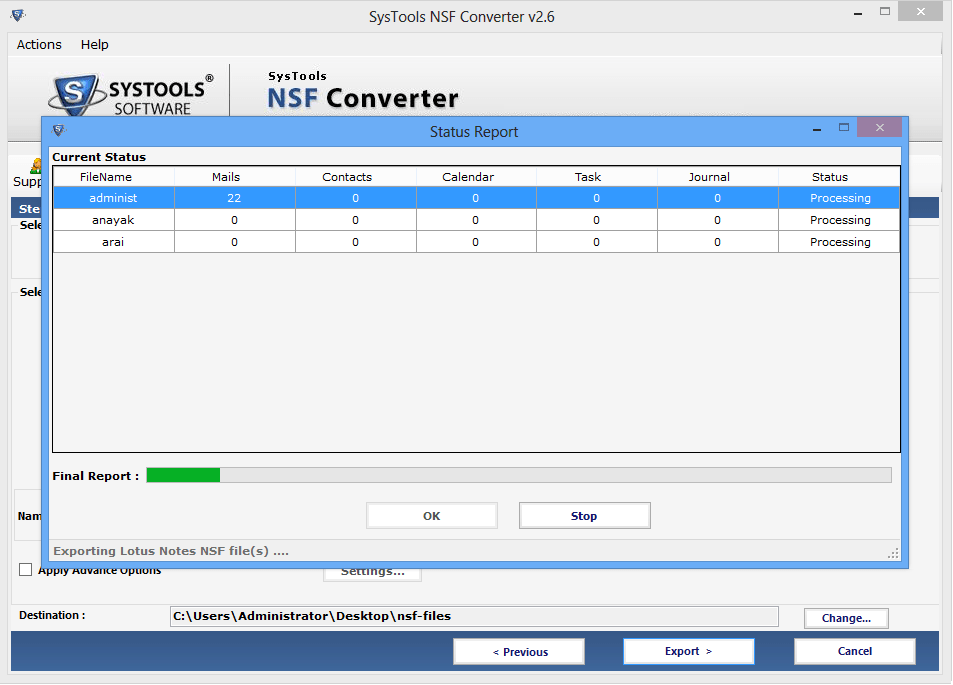
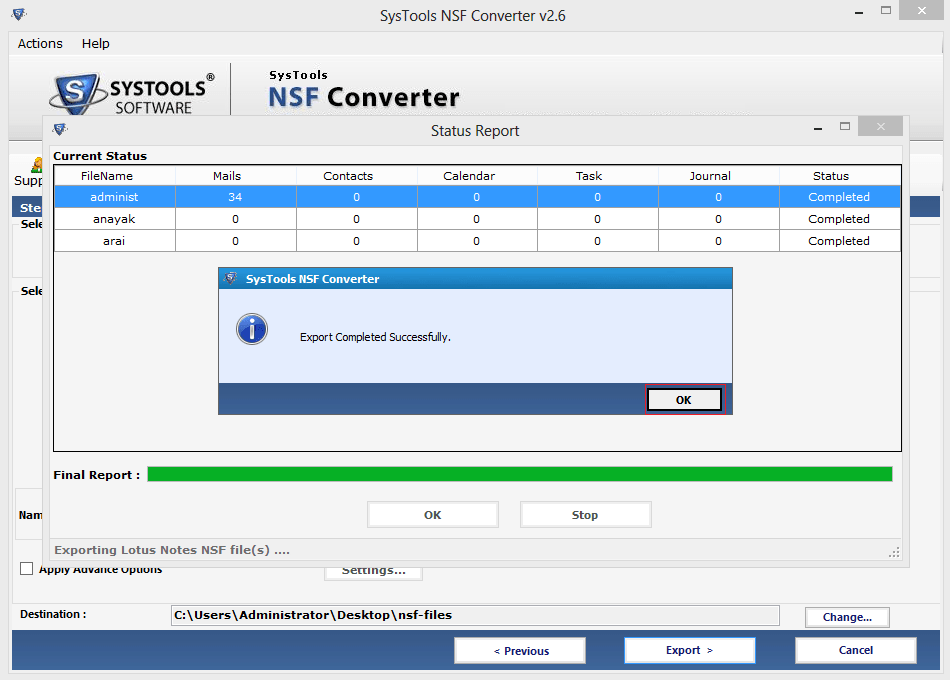
- Now when you enter the password, status report will be generated
- After that a message box will appear on your screen which shows that the migration process is done successfully.
If you want to convert conatcs then browse names.nsf file and click on next button to start the conversion process.
After choose the Bulk Conversion you have to select the bulk NSF files you want to convert.
The Category option to check the require folders from name, mail address etc. You can also select all of them as well.
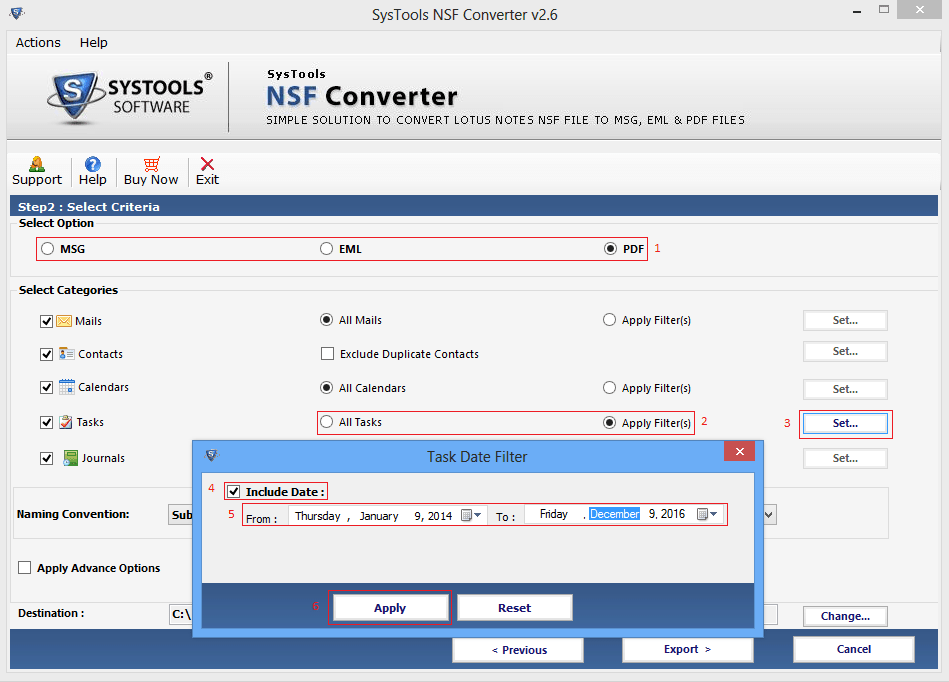
Apply Task Data filter in Tasks
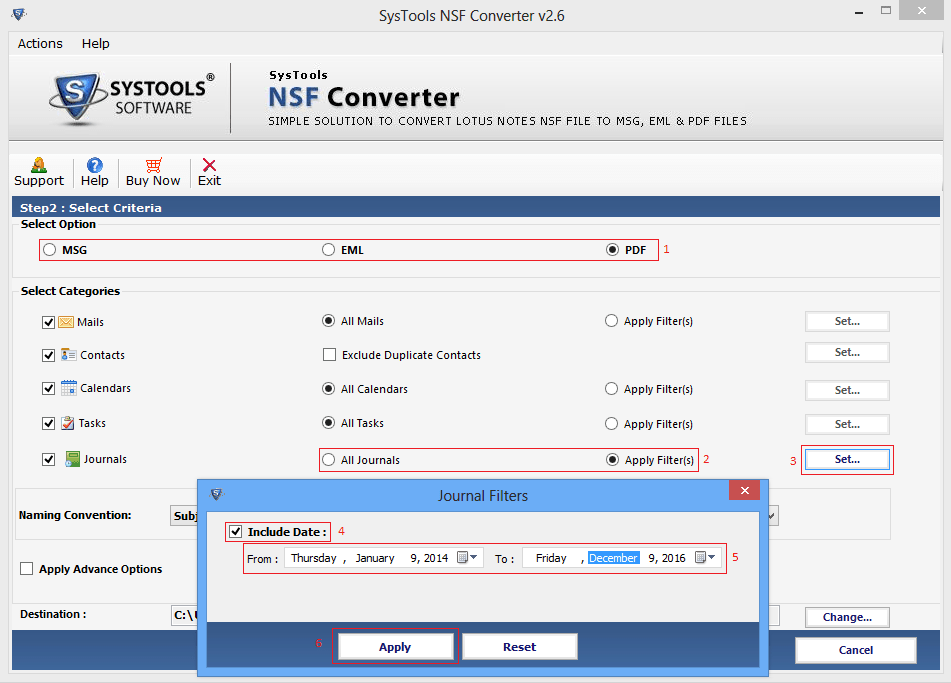
Apply journal filter in journals
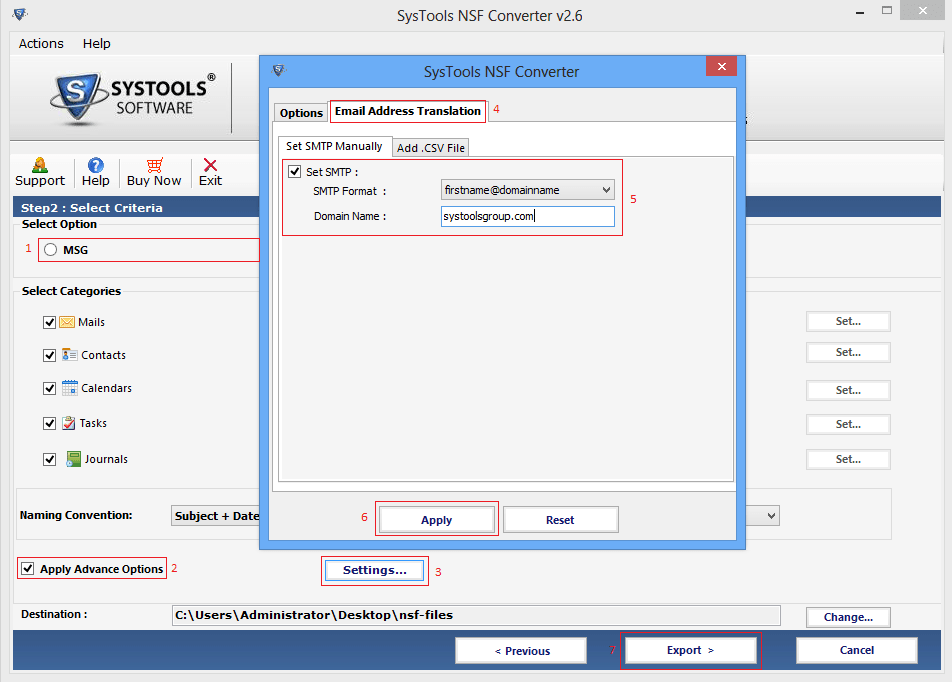
In Advance section option available in which SMTP set manually.
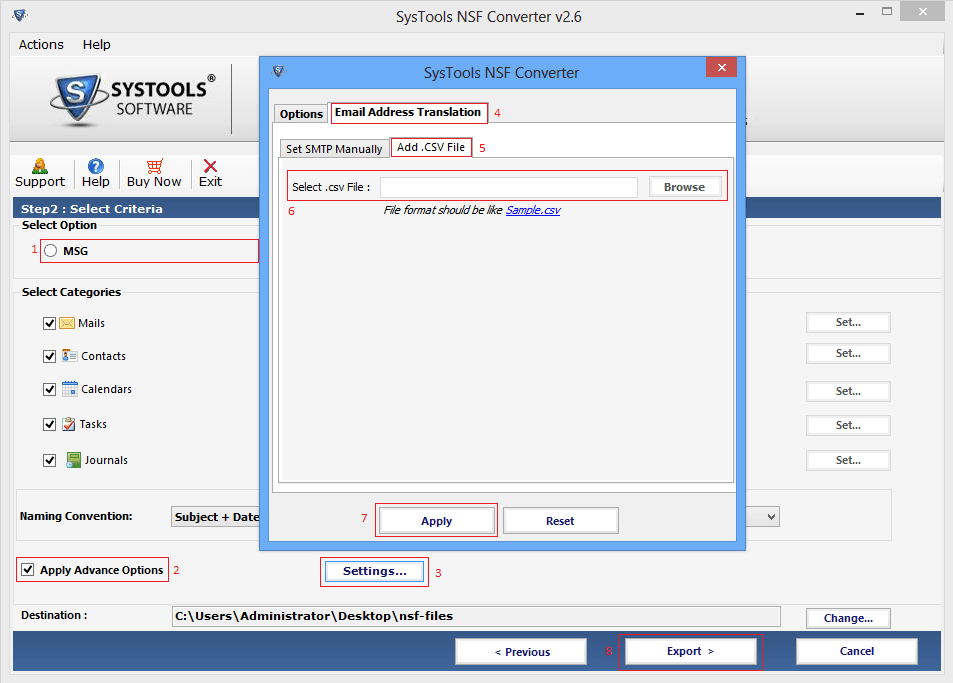
Apply add.csv file option and browse csv file.
Now you will show the current and final report on the screen.