How Product Works - Follow Sequential Steps
- Launch PST Merge software from the installed location or Go to Start Menu » All Programs » PST Merge to begin the Outlook PST merge procedure.
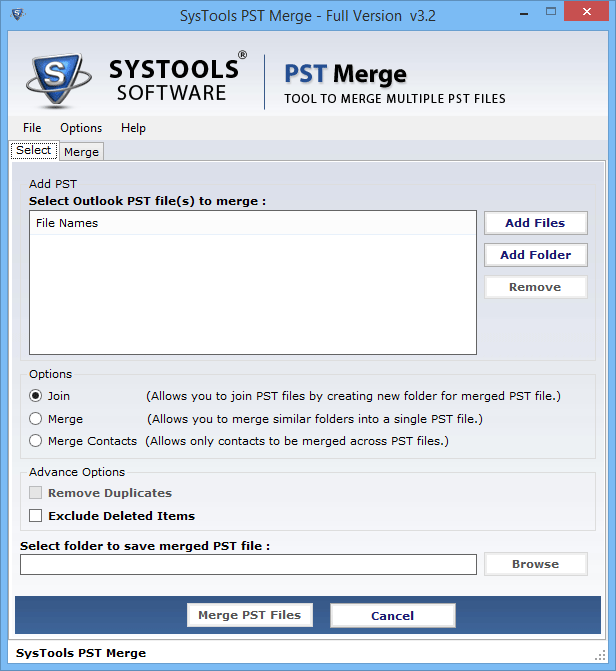
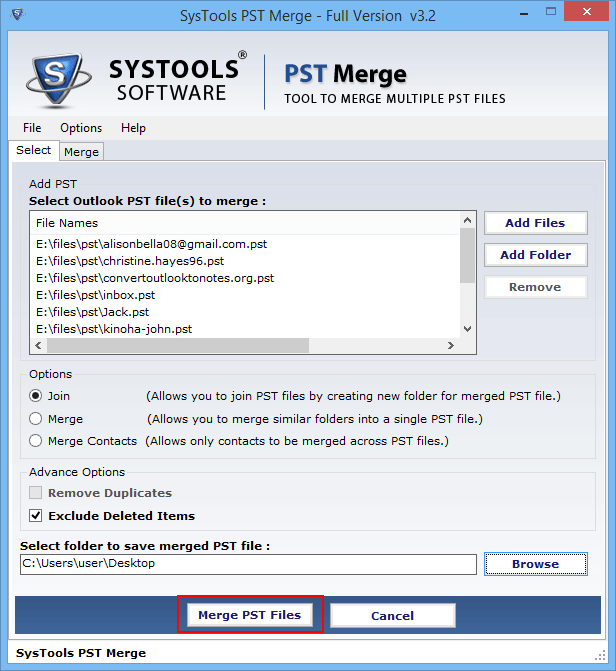
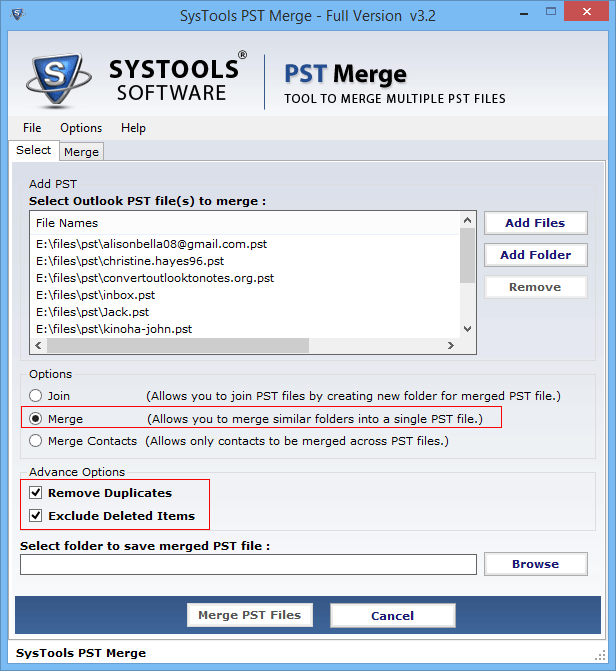
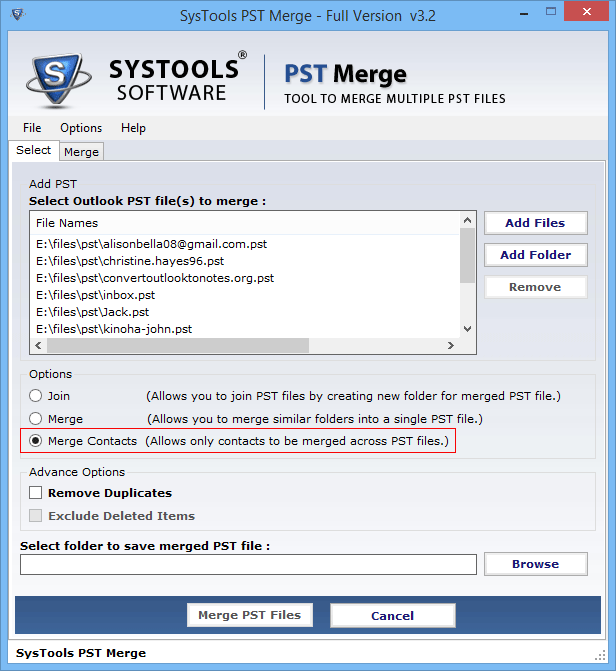
- Click "Add Files" to manually add PST files one by one or "Add Folder" to add the complete folder containing the files to be merged. The software scans and display them in the adjacent pane with File Names and their source path.
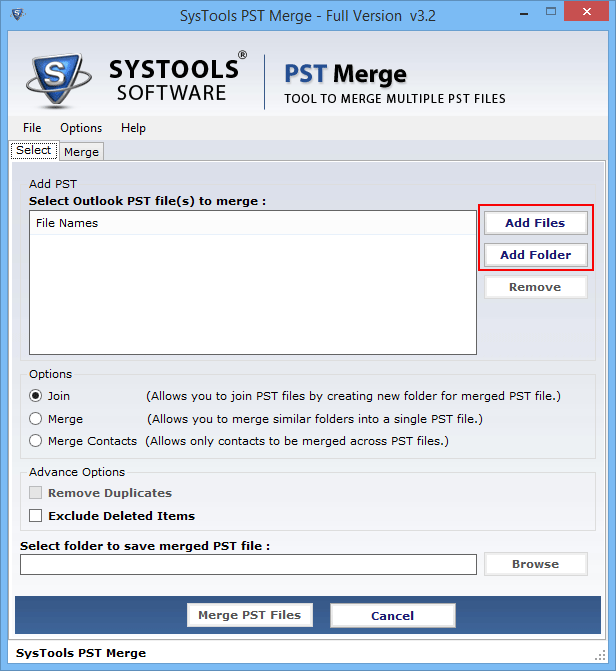
- The software provides multiple options to Merge PST files such as Join / Merge / Merge Contacts. Choose the option as per your convenience. You can also choose the advanced options such as Remove Duplicates or Exclude Deleted Items accordingly.
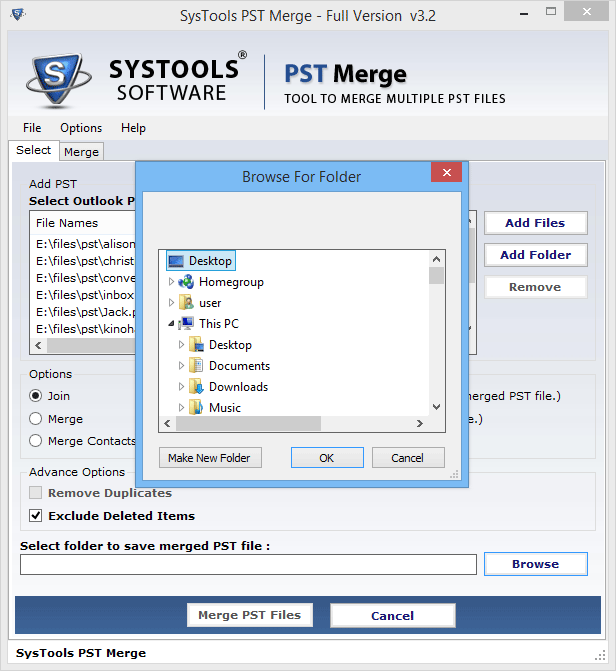
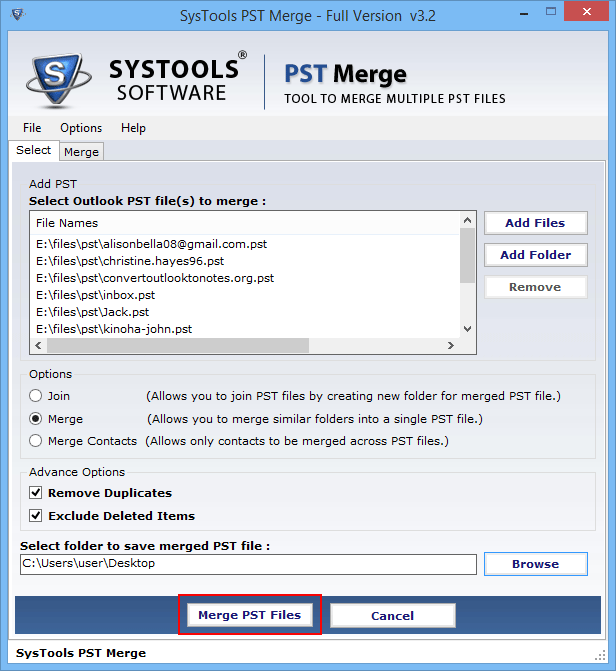
- Now click on the "Browse" button to choose the destination path where the merged PST file would be stored. Create a new folder if you wish to store the file separately. Click OK to proceed further.
- For Join Option: Click "Merge PST Files"button to join the selected PST files.
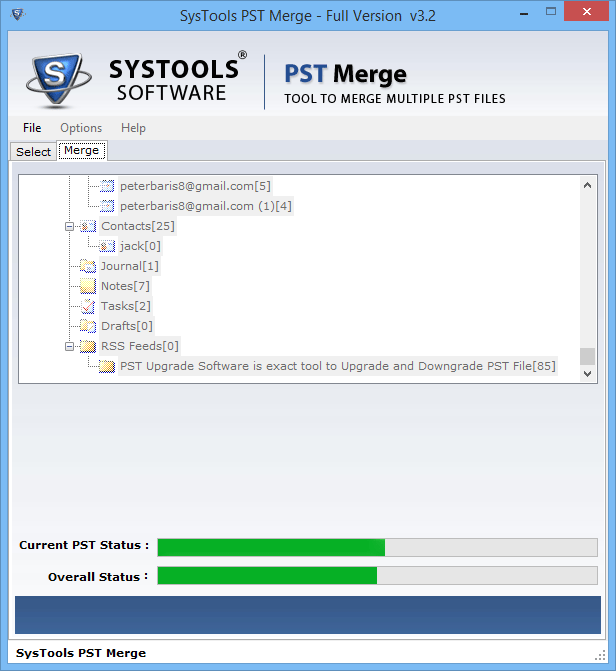
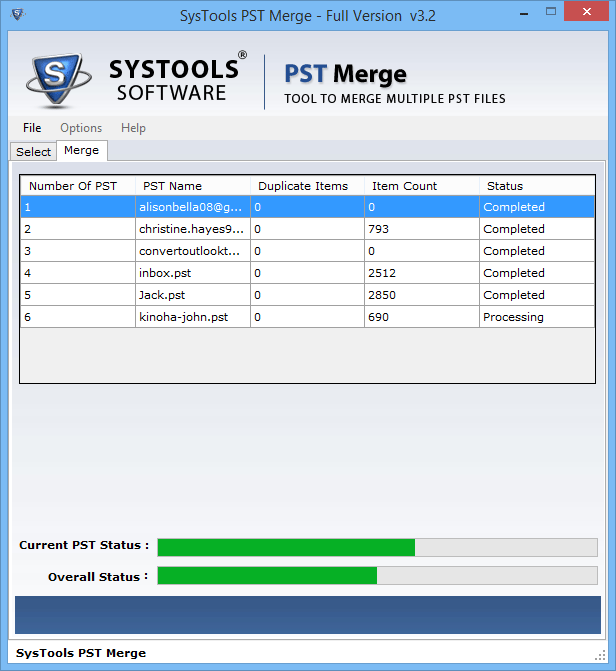
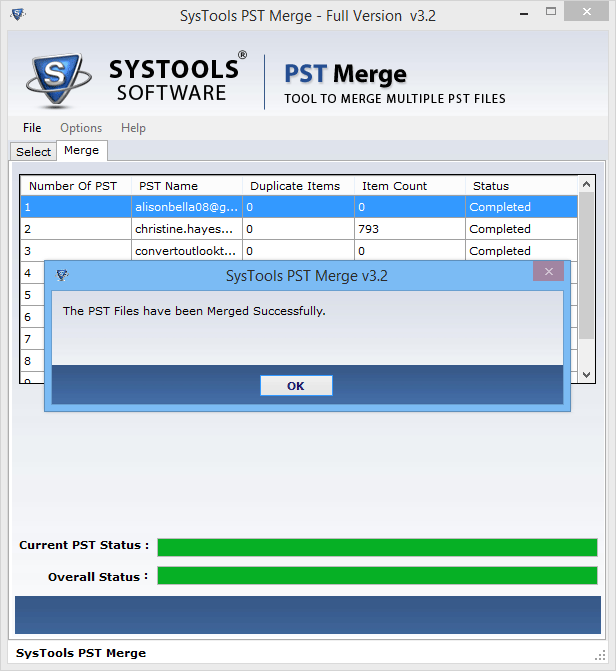
- As soon as you click on the Merge PST Files option, the software initiates the operation and displays the ongoing process on the Merge Pane. A Hierarchical view of the PST mail data could be seen along with Current PST processing status & the Overall process Status.
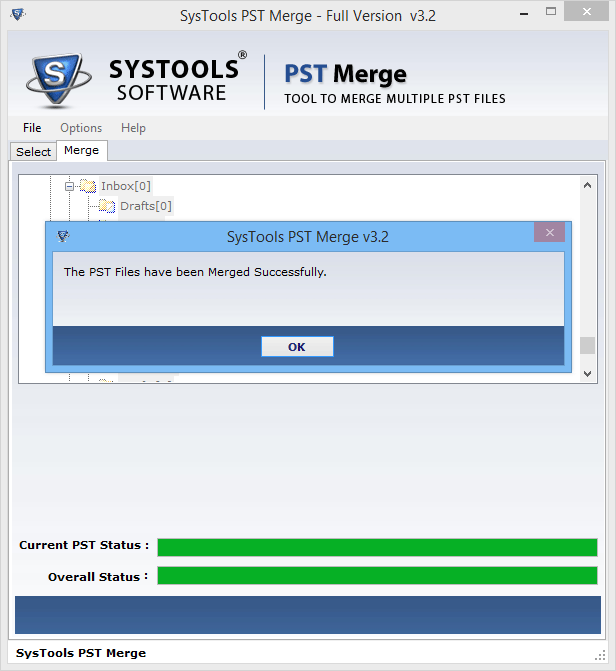
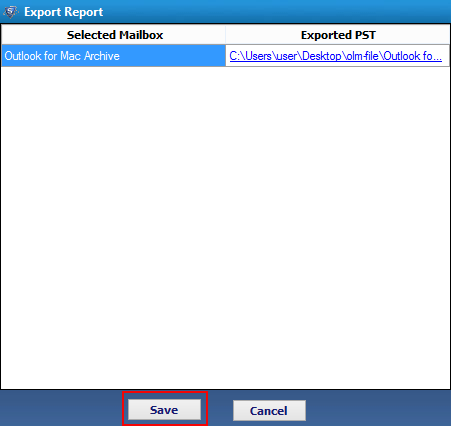
- After completion of the process, a dialog box appears confirming Successful Merge Operation.
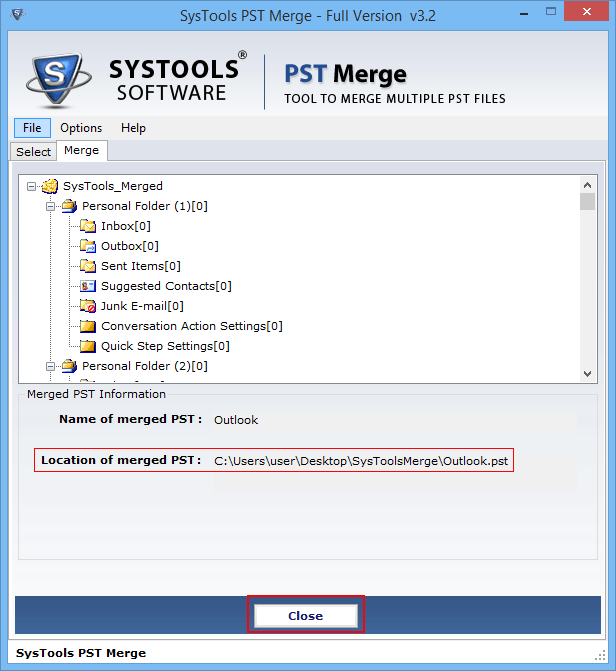
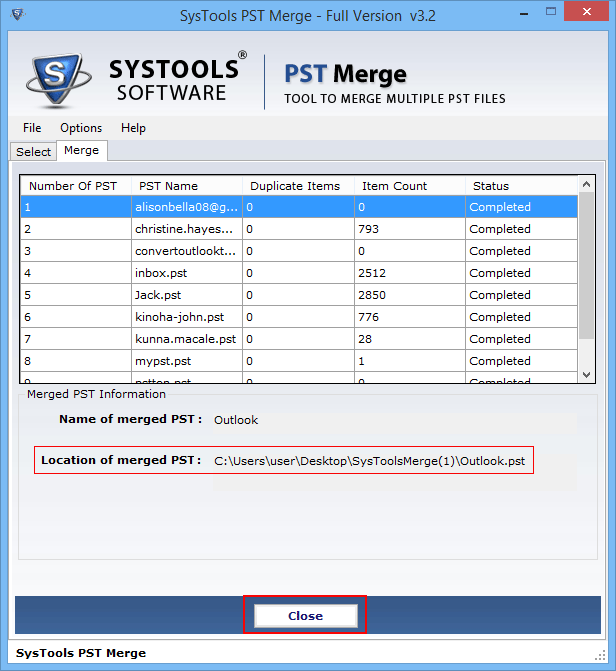
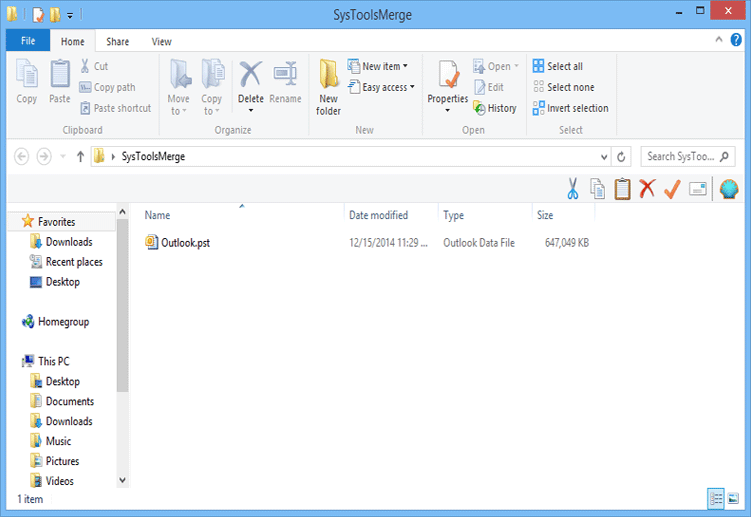
- Finally the software displays the Merged PST File Information such as Name & Location where the file got stored.
- To merge similar folders into a single PST file, choose the Merge option after adding the files and folders to the Merge list. Choose the Advanced options such as Remove Duplicate entries & Exclude Deleted Items to get rid of the duplicate entries and the deleted items present in the Merge List.
- Now Browse the Destination Location where you want to keep the merged PST file. Click on the Merge PST Files option to execute the process.
- As soon as the process begins, the detailed progress of the process is visible in the Merge Pane with details such as PST File Name, Duplicate Items, Item Count and the its current Status. The merge operation overall status is shown in the progress bar located at the bottom.
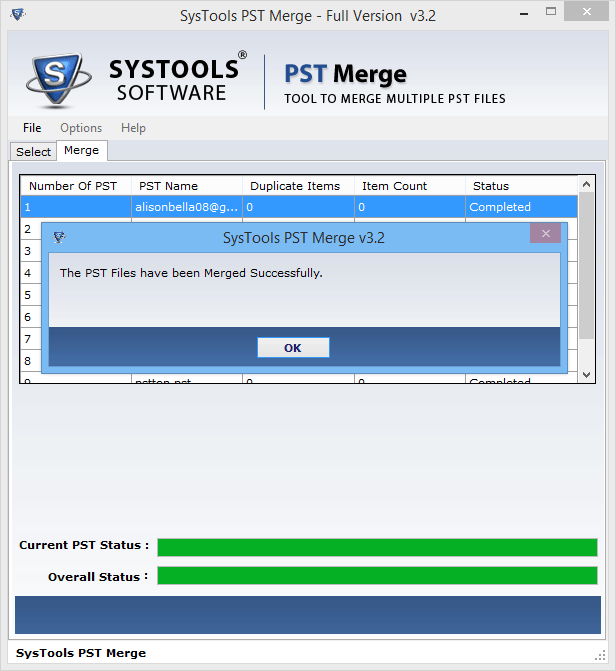
- As soon as the process gets completed successfully, the software shows an alert. Click on the OK button to proceed further.
- Upon completion of the process, the software displays the Merged PST file Information such as Name & Location of the merged PST File.
- To merge only the contacts present in the PST file, choose the Merge Contacts option as soon as you add the Files or the folders.
- Follow the similar steps as explained in the Merge procedure to browse the folder location and then hit the Merge PST File button to start the process.

- Upon completion of Merge Contacts process the software display success message. Click OK to proceed further.
- The software finishes the process by displaying the complete information of the Merged PST File Contacts such as Name & Location of the merged and the duplicate contact CSV files respectively.
- Now you can verify the merged items and PST Files by opening them separately in MS Outlook.
- To view the PST File information Go to File » Open & Export » Open Outlook Data File
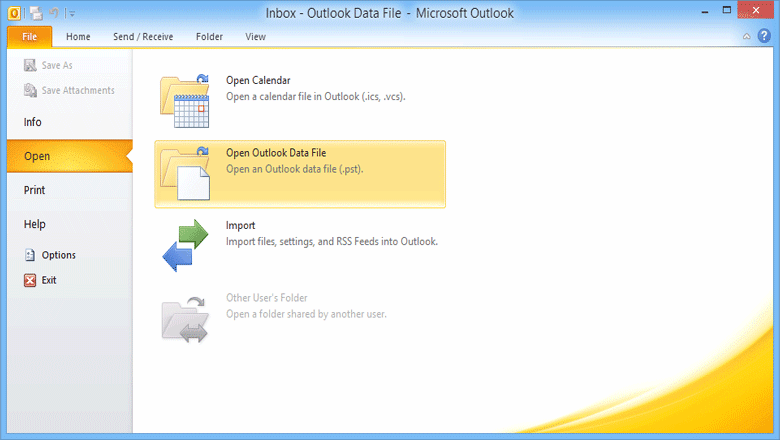
- Now select the merged PST file from the location where it was stored by the PST Merge Software.

- Now you can view the Merged PST file data in Outlook.